Showing posts with label Print Head. Show all posts

Tuesday, 14 April 2015

My print quality is poor and I think my print heads may be clogged. How do I clean the print heads?

Use print head cleaning procedure to get best quality print outs
Add caption

Poor quality prints are a common occurrence and can have several possible causes. Sometimes we need to eliminate the probable causes one at a time before going to the expense of replacing an ink cartridge. The first step is to perform a test print out to see exactly where the problem is. Is the issue the ink coverage or is it in the alignment of the print? The alignment problem is easily noticeable as the text may be slanted or distorted but other print clearly enough. The other problem that you can encounter is the obvious poor quality of the print with parts missing or gaps appearing in the text or image.

Printing a test print will reveal where the problem is. To print a test page go to file print > properties > maintenance > print head alignment. You will need to load several sheets of paper in the printer as you will more than likely be printing out several test pages. The alignment test page will show if the letters are slanted and ask you to choose the best settings from the display in an effort to reset the alignment. It’s quite rare for the alignment to require must adjustment but it does happen from time to time. If the alignment is not the issue then it’s time to print out a text page to check the print quality.

To print this test page go to file print > properties > maintenance > nozzle check. This will print four lines of each colour and display any broken lines or gaps in the printing. If the four lines are not completely solid, it will be necessary to perform a head cleaning procedure in an effort to clear any blockages either in the print head or ink cartridges. To perform this the head cleaning procedure go to file print > properties > maintenance > head cleaning. After each head cleaning procedure it is necessary to print a test page and you will be prompted to do this by the cleaning programme.

If the print out is not to the standard required it may be necessary to perform this procedure several times. This of course will affect the life of the ink cartridge as quite a lot of ink is dispensed during the head cleaning as it is forced through the print head as it tries to clear any blockage. If none of the above make much difference to the print quality it is worth trying a new cartridge in case one of the cartridge is faulty – try replacing the black or one of the colour inks that show up particularly bad on the test page print out. In some cases the print head may be worn and require replacement, in this case it may be more economical to replace the printer depending on the value of the current printer.

Originally published at printerinkcartridges.ie

Tuesday, 7 October 2014

My printer is connected to my computer but not printing

If a problem exists within your printer i.e. the printer driver or the application you are trying to print from try the following suggestions to identify and hopefully solve the issue.

Find useful suggestions if your printer is connected to your computer but it is not printing
Firstly, make sure your printer is switched on and ready to use and that the correct printer is set to default. This is accessible in printers and devices from your Start menu. If the printer is correctly set as the default printer or you need to select it as the one you are about to use then try to print a test page.

Try printing from Notepad or from a Word document. This verifies that the printer driver is correct, and confirms that the problem lies with the application. If you cannot print from Notepad or a Word file, the problem lies with the printer driver.

It may be necessary to uninstall the printer driver and install a newer version which you can download form your printer brand website. If the printer will print a test sheet but the print quality is poor then you may need to perform a head cleaning procedure. If the ink cartridges have not been used for a while it's possible that the print heads have become blocked. To perform a head cleaning procedure – depending on your printer – you can either complete this directly on the printer or through your PC and a Notepad or Word document.

Blocked print heads do not mean there is a problem with the ink cartridge as such, the ink has become hard and congealed around the print head and can be cleaned using one of the following methods.

For those printers that come with an interface, (this is basically a control panel normally located in a window on the front of the printer), this allows you to perform certain functions within the printer independent to the PC. With the printer switched on, move the arrow until you find maintenance then move the arrow until you locate head cleaning. Follow the operating instructions it gives making sure you have plenty of paper in the printer. It may take several attempts to clear a blocked printer head and even result in having to replace an ink cartridge as this procedure does use a lot of ink. The second option is from your PC – go to file > properties > maintenance > head cleaning. If there is no printer interface then you will have no choice but to perform this procedure. Remember it may take several attempts to clear a stubborn blockage.

It is more likely that this will happen when using compatible inkjet cartridges, as they do not contain the chemical found in original brand cartridges that prevents hardening of the ink.

Friday, 19 September 2014

My Compatible Black Ink Cartridge Will Not Print for Me

If you have installed your compatible ink cartridge and it will not print there are a few things we need to check first of all. Is there an error message displayed? For example is the error message displaying 'ink cartridge not recognised'? First of all check that the ink cartridges that you received were the correct cartridges for your printer. In some cases the printers are listed on the packaging of the cartridge – however in some cases not all the printers that work with that particular ink cartridge will be listed on the box. The reason for is because some inkjet cartridges will work with over 50 printers of the same brand and it's impossible to fit all the printer models on the packaging.

Get Solutions when your Printer is not printing with compatible Black Ink Cartridges
If you are certain the cartridge is the correct type for your printer, make sure all packaging and plastic wrappers are removed. Next remove any seals that are on the cartridge, there will generally be instructions with the cartridge that will confirm this. There may also be a plastic clip on the cartridge (only in some cases will this be present), remove this also and insert the cartridge gently but firmly until a 'click' is heard. Once the cartridge is inserted correctly the printer will begin ‘charging’ and resetting itself preparing to print. If, when you install the cartridge an error message appears 'ink cartridge not recognised' remove the cartridge, gently wipe the 'chip' area (copper microchip plate) with a soft cloth to remove any static that may be causing any issues. Re-insert the cartridge and see if this will work successfully. You may have to try this 4 or 5 times. If this does not get the cartridge recognized then with the power on remove the power lead from the back of the printer and leave for 5 minutes. This will cause the printer to reset and may clear the memory of the non-recognition of the ‘chip’. If this fails too then the problem is most likely a faulty cartridge so you will need to replace with a fresh cartridge.

If the cartridge is accepted then it is best to perform a head cleaning cycle. This can be accessed via the maintenance section of the utilities - this can be found by going to file print > properties > maintenance. Be sure to print a test page to show the performance of each individual ink cartridge. Performing the head cleaning operation will use ink but will help push the new ink through the print head and maintain print quality.

Click Here and Order for your Ink and Toner Cartridges


Friday, 20 June 2014

Linked to a Networked Printer but its Not Printing

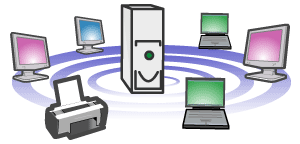
Sometimes the first thing that comes to mind is that the problem may be with the printer or the ink cartridges but a process of elimination will help discover where the issue is. If you are linked to a network first of all make sure that your printer is connected to an outlet from the hub and is online.

How to Link to a Network Printer
Go to your start menu and select settings followed by Printers and Devices. Next, double click on the printer icon and this should display any print jobs in the queue for that printer. Check if there are any error messages displayed in the printer log window. If an error is displayed then delete the job – only if it is one of your print jobs! If you are deleting the job, right click and choose cancel printing and resend the job for print.

If the problem still exists, try resetting the external hub between the printer and the hub box. Also check if there are any problems with the cable connection between the hub and the printer. You may need to reconnect the printer to the network hub. From your start menu go to settings and choose printers and devices, then double click add printer and click next. Select the option connect to this printer and type in the network path for the printer you wish to connect to. Follow the instructions on screen and select the printer to be your default printer.

If you discover your printer is now working but the print quality is poor, it may be that one or several print heads are clogged and a head cleaning procedure may need to be carried out. There are two types of print head within a printer. Firstly, there is the integrated print head, where the print head is located in the ink cartridge and secondly the print head is located directly in the printer and no the ink cartridge. If the print head is located in the ink cartridge, then the print head is being replaced every time you replace your ink cartridges. You may refill these cartridges – if you have experience of this – or sent off to be professionally refilled. The head cleaning operation for both types of print heads is straight forward and can be performed using the printer utility section and clicking on maintenance. Within the maintenance you can select to print a nozzle check, which will tell you if there are irregularities in the pattern. If so, proceed by clicking ‘clean heads’ and print another nozzle check. This will use up ink from the ink cartridge and can reduce the volume level drastically in some cases as it may take up to 4 cleans to clear a blockage.