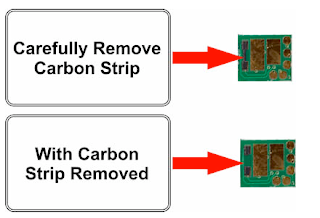
 If you have a problem with your remanufactured or compatible Kodak ink cartridges being detected by your printer, then follow the simple steps outlined below.
Carefully remove the carbon strip. Once the carbon strip has been removed from the cartridge please insert the cartridge into the printer. Please make sure that you NEVER touch the chip on the ink cartridges with your bare hands as this may damage the cartridge.
Cleaning blocked heads on my Kodak printer
Begin by going to the printing preferences in the Kodak printer programme and select Maintenance. Follow these instructions to access your head cleaning cycle:
- Start > (Control Panel)
- Printer > then right click on the Kodak icon
- Printing Preferences
- Maintenance
- Nozzle check
(This is important as it will print out a sheet that will show if the cartridges are printing correctly. You can compare the printed sheet to the on-screen image of correctly performing ink cartridges). - Head Cleaning
- Test print
You will need to repeat the nozzle check each time you perform a head cleaning cycle to ensure that the printer cleans the head thoroughly. The printer will know when you are repeated cleaning it and gradually force more ink through the nozzle in an attempt to clear the blockage. You may use up more ink than usual performing the head cleaning operation and it may result in you replacing some of your empty cartridges. It is advisable to perform ahead cleaning cycle after each ink cartridge replacement, this will be in the printer handbook under maintenance.
For people who own the older version of the Kodak ESP printers it is recommended that you don’t download the firmware updates offered by Kodak if you are using compatible ink as this may affect the cartridge recognition. Lately the firmware downloads offered by HP, Epson and Kodak have been known to have a detrimental effect on remanufactured and compatible ink cartridges.
Click Here to View Our Special Offers on Kodak Ink Cartridges

No comments:
Post a Comment